The Tale Of The Talk Audio Mad Scientist
One of the privileges of working on Talk Audio magazine and forum is the people I get to meet in the virtual world. From slightly bonkers attention seeking women, who come to wind the poor boys up, to impossibly cool warriors-of-everything who read like mangos but are actually quite not. All the way to the genius or the Man God!
For the trouble is, we all know that they walk among us online.
Those genuine man gods with intellects and skills that make us mere mortals feel just that – bloody mere. And I have never felt more in awed respect or more ignorant and thumb-fingered plain stupid in my abilities (I hook rig after rig after rig together to test car audio, of course) than when I read this thread on simply ‘General Car Audio’ on the Talk Audio forum boards.
The thread is still there and you can go and express your opinions on what NeX is and what he has done, as well once you have checked this out. For while the forum has limits to the amount of pictures you may post in one entry, I have a delicious and uncouth right on the magazine. I AM the editor and can post ALL the pictures he posted – or wanted to.
It is called, ‘DEX-P99RS Tear Down And Hacking Fun!’
Now, for most people, pulling a thousand-pound headunit apart is not ‘fun’. It would be terrifying. This chap dismantles one and then starts modifying and improving little features&;.read on. I can tell you that this thread has been noticed all the way up to Tokyo-engineer level within Pioneer and is certainly being checked out by the Pioneer executives in the UK, as well as the boss exec in the European headquarters! From my point of view, his written English is better than some freelance writers!
Here’s the story of an empirical genius:
Hello everyone, my name is NeX and I have a problem.
My problem is that I can’t leave stuff alone! If its advanced and expensive enough, sooner or later I will have it in bits to see how it works and usually will end up modifying it until it’s better or broken…
One of my prized possessions is my Pioneer DEH-P99RS CD head unit. It cost me over half of what it cost me to buy the car I am putting it in! So either it’s expensive or I have a cheap car. But I wanted to see if anything could be done to it to make it better. One thing I know is if you buy from a company, what you buy will never be as good as it could be.
So first of all here is a tear down of the P99 so you can see what’s inside and you don’t have to destroy your own, if you are curious.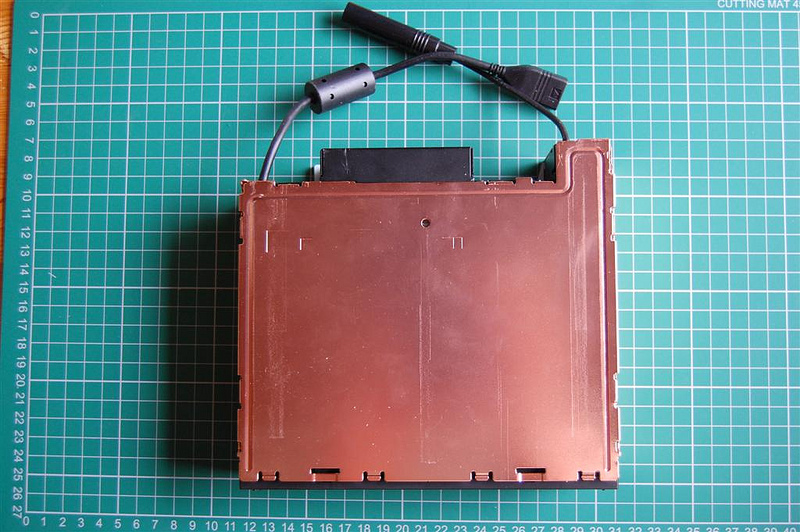
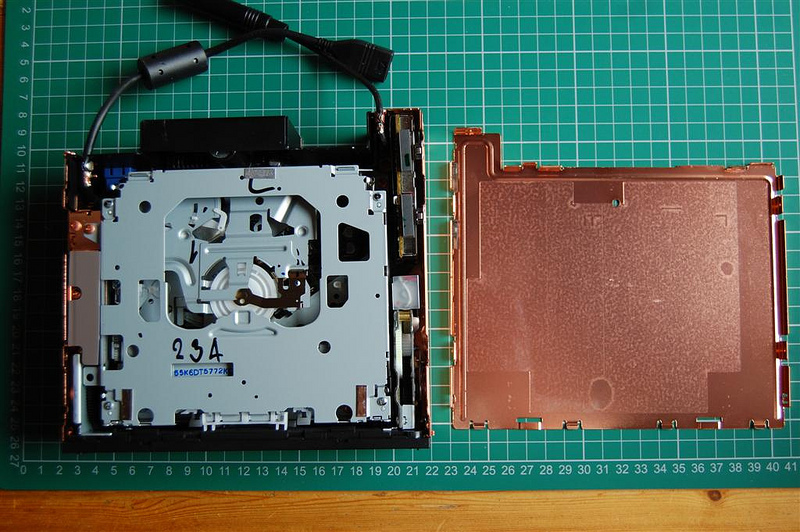
Copper plated Chassis and even screws! Very nice details.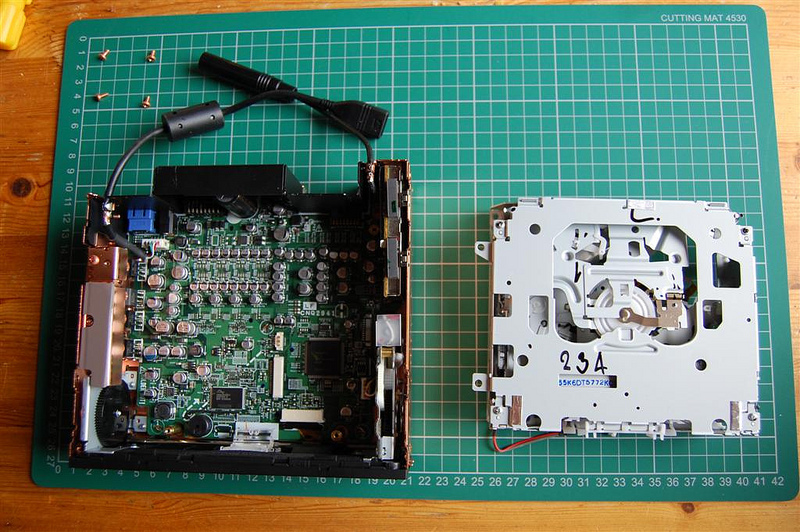
The CD drive unit.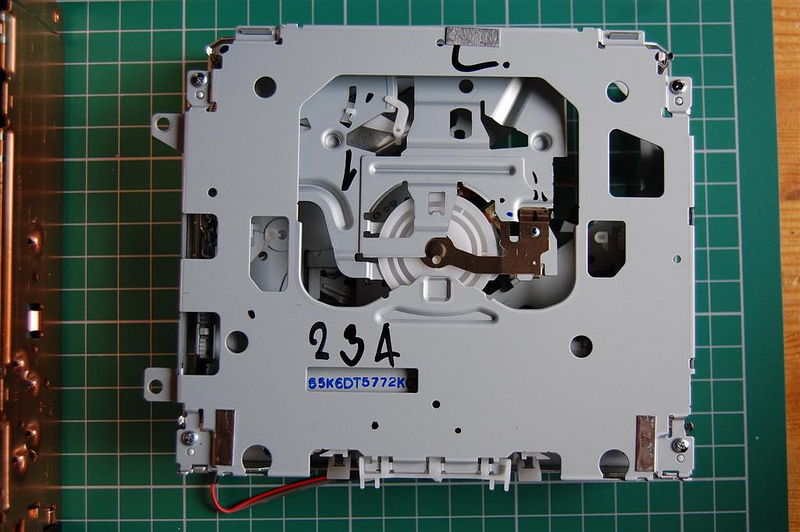
The main board maintains equal lengths in the signal lines. There has been a lot of attention to detail in its design.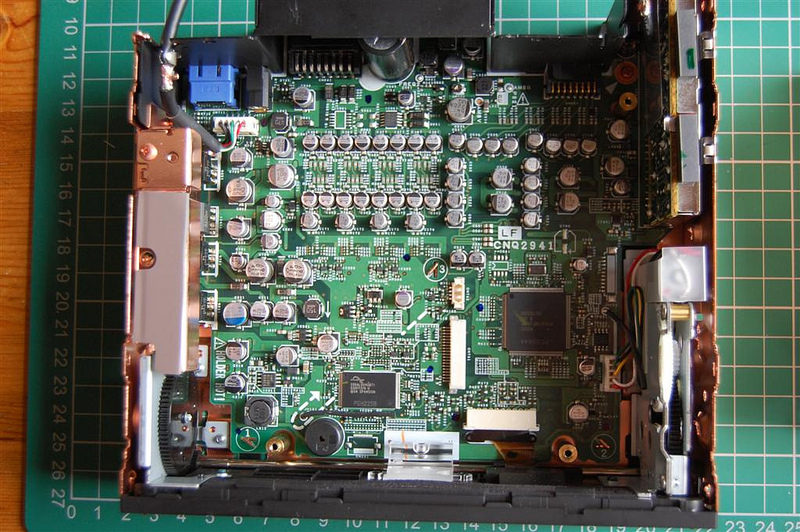
Front panel: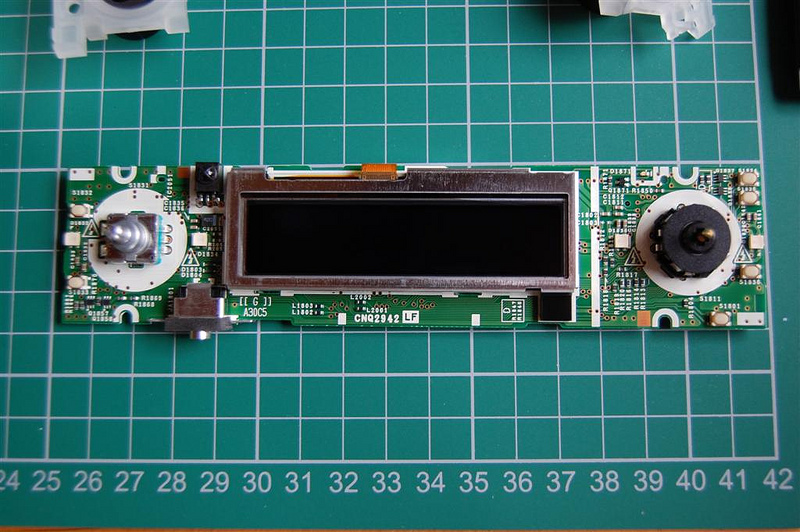
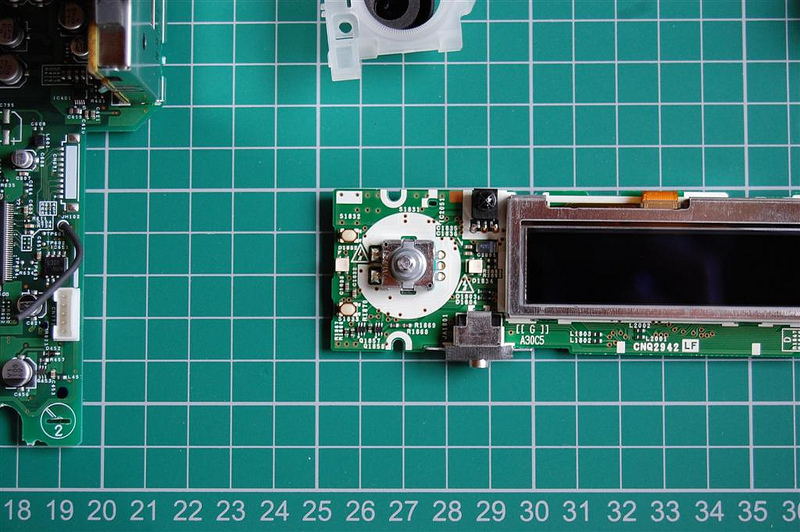
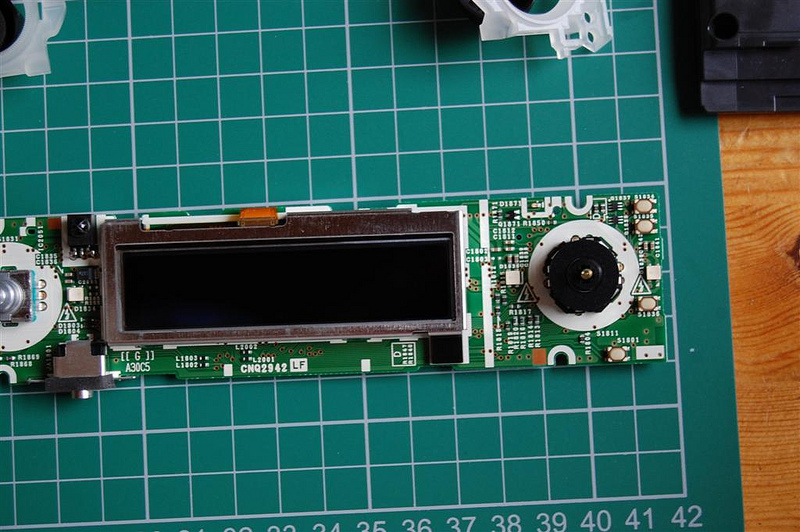
More innards&;.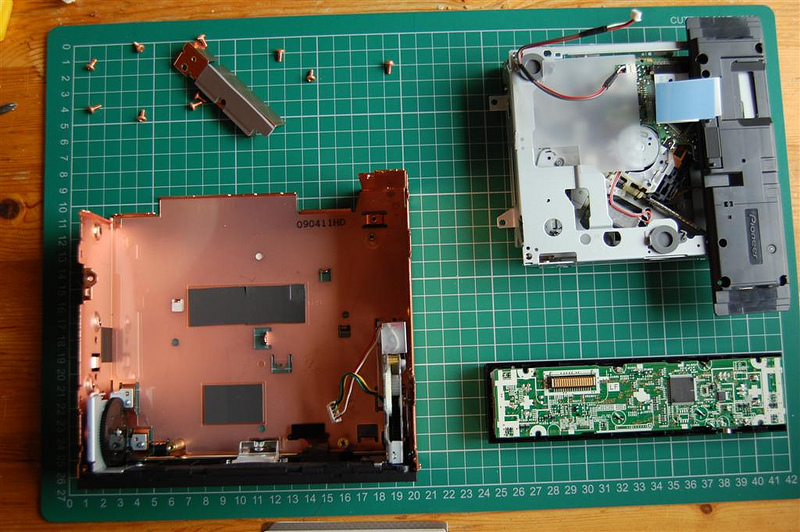
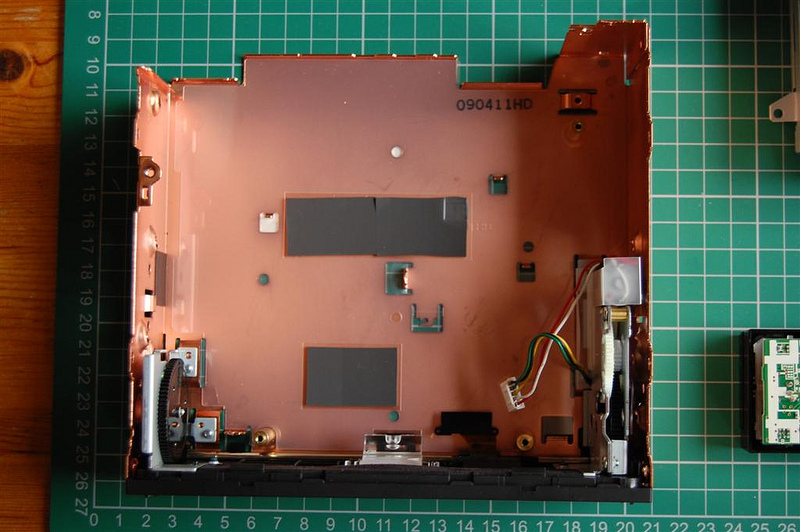
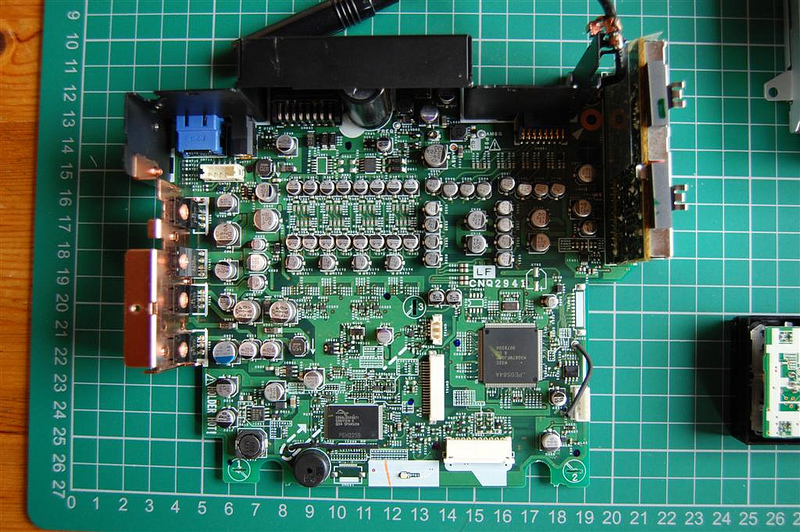
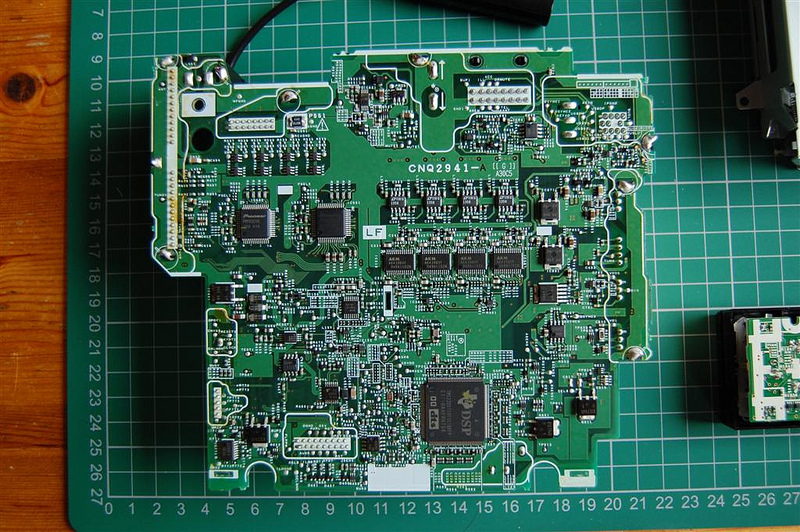
OK so that is the complete tear down, which included de-soldering the back metal bracket.
So there were a few mods I had in mind. The first one was the front Aux jack.
One thing I hate, is headunits with wires sticking out of the front. it was nice for Pioneer to put the jack at the bottom so the looks weren’t ruined but still I don’t want to plug things into the front of my headunit. To add insult to injury, the jack is also a 2.5mm jack. So you need an adapter before you can plug any normal equipment into it anyway. Also the position of the CD player in my car means that nothing big can be plugged into that socket (other than the calibration mic) because it will foul on the rest of the centre console.
So my idea was to move the jack to the back. This is not so hard to do because obviously the jack sends signals from the front panel to the main board so I can just pick up the jack points on the main board and wire a jack socket to the back. this would also leave the original jack intact for using the calibration mic.
Here is how I achieved that:
Start with finding a suitable point on the back plate to drill a hole for the jack&;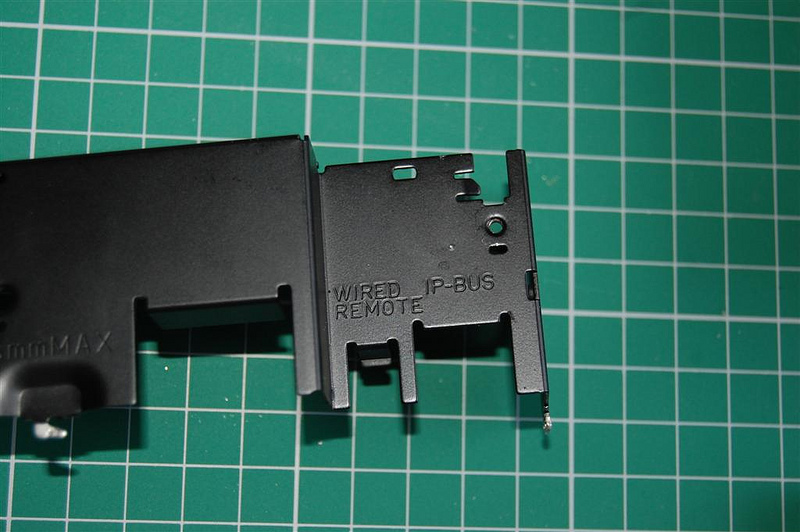
Next, drill the hole and put in a nice looking, high quality jack socket. this time 3.5mm – so its actually usable.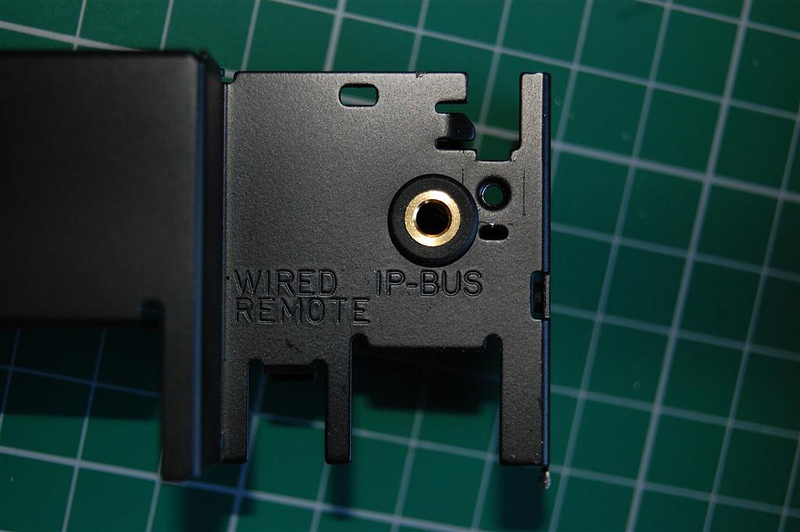
Then, heat shrink some shielded wire to the other side&;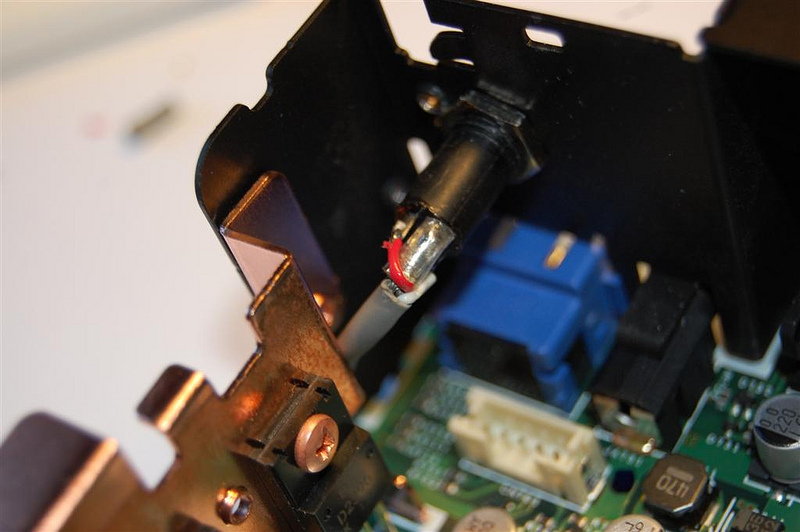
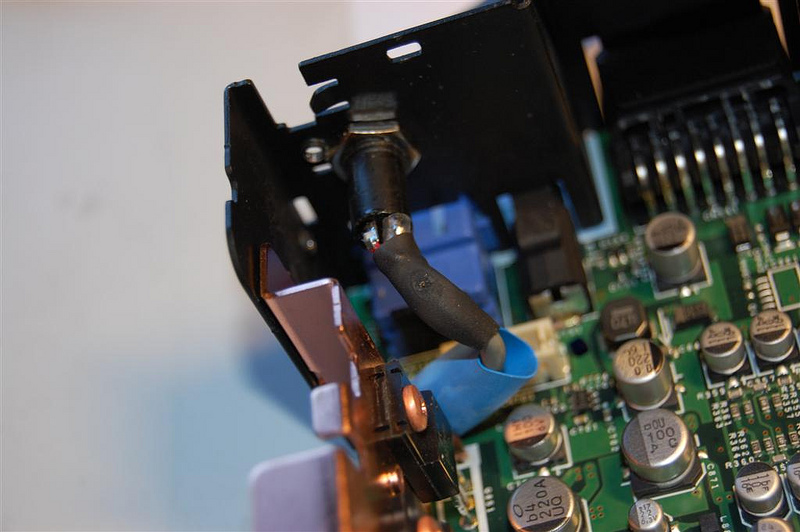
I used blue heat shrink because all blue cables will be line level analogue audio in the car.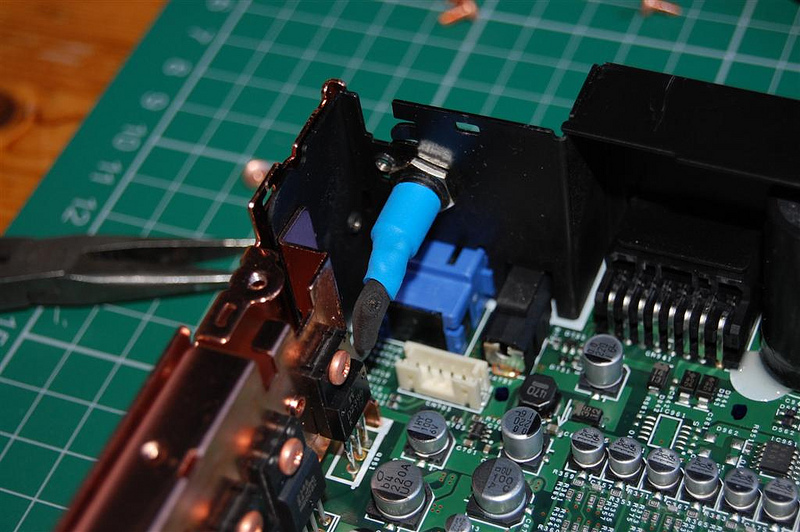
Although the wire is shielded, I still wanted to keep it away from the analogue audio side of the board, so it passes up against the power regulators instead.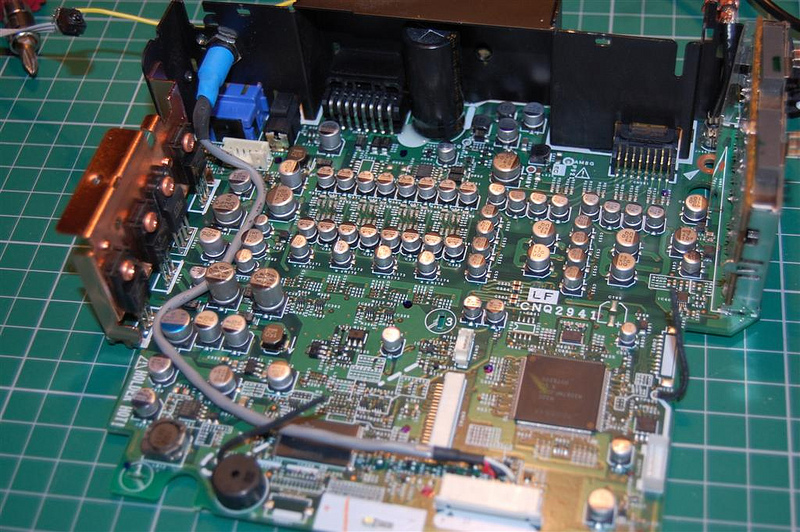
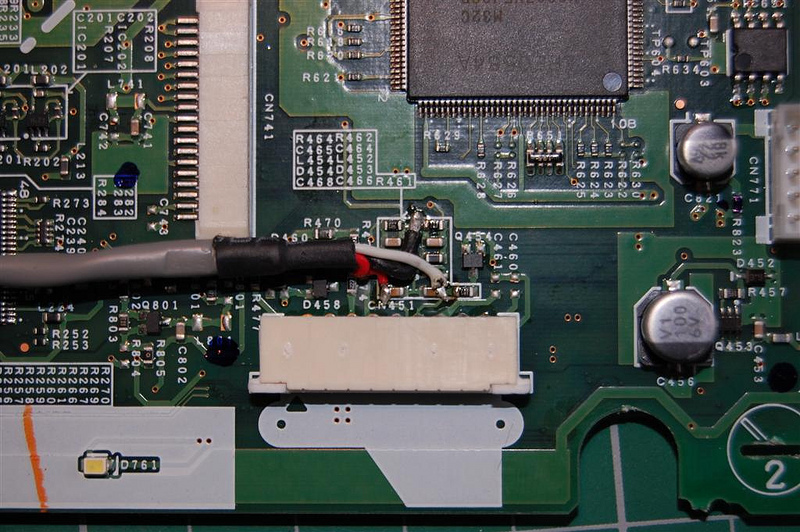
And that is the jack moved to the back! It all works fine once the second Aux is enabled in the menu and I can hear no distortion in it, so I consider it a success!
Next I had a few odd ideas, one was to try and change the backlight in the display to an RGB one so that I could control the colour of the display as well. But it turns out the screen uses a technology I didn’t even know existed. apparently also it is Pioneer’s own design as well. The screen is similar to OLED in which each pixel is self illuminating. Rather than LCD where the pixels change the colour of the glass and a white light behind them is used to illuminate them. So there was no chance of making an RGB backlight because it didn’t use a backlight!
But instead of OLED it actually uses Electroluminescent Phosphorus for each pixel. this is the same stuff that wrist watches used to have as backlights, back then they were a blue green colour. It was useful because it gives even light and is paper thin. Most portable devices with a backlight used this technology until colour screens came in. They did eventually figure out how to make it white but LED technology took over before it became more widely used, so I thought the technology was dead. It’s very interesting to see it in this display, as it is brighter than a regular OLED display.
But anyway, my car is red, everything in my car is red, I wanted to see if I could think of a way of turning the display red, and came up with the very low tech idea of a red plastic filter: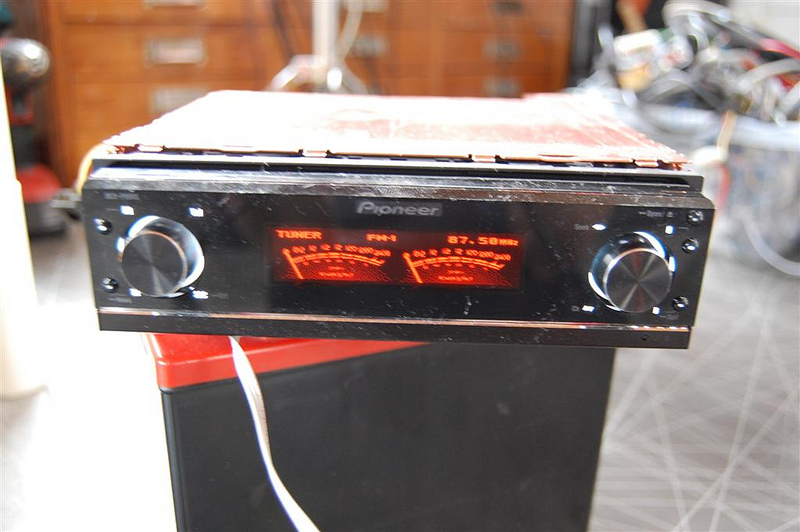
It worked pretty well but it was more orange than red and didn’t match the red of the controls. So I ended up not using it. Just as a note, my head unit is not scratched, it’s brand new, that is just dust.
Next I wanted to see if I could control the data on the screen. I wired up a system so that I could intercept data going to the screen. I will have a computer in the car, so I was thinking it would be good to be able to put track names on the CD player when using the computer to play music. Here was the setup: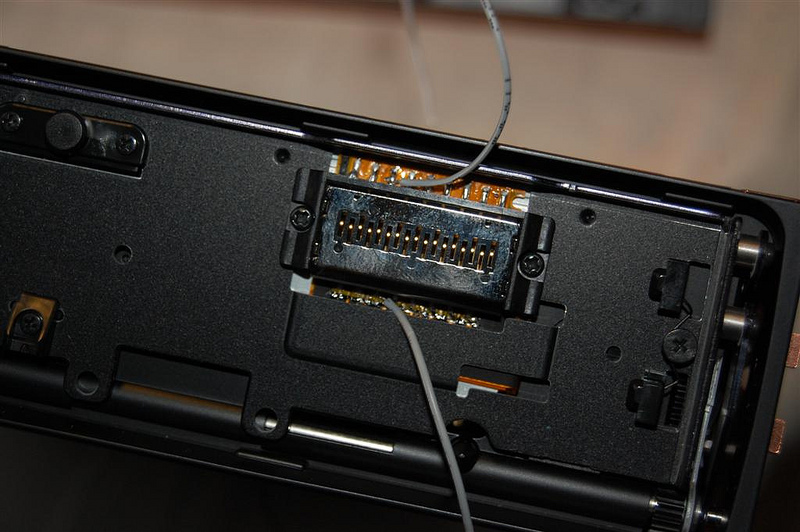
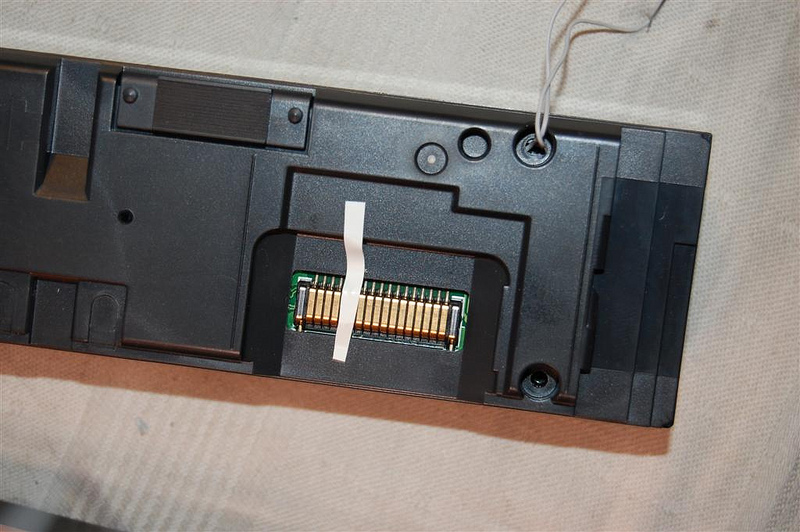
I intercepted the data lines going to the screen and managed to extract the serial data to my computer but I gave up because I no longer have a Scope or a logic analyser and trying to work out the protocol would have been near enough impossible. But it was nice to know that it used ‘standard serial’ to send commands. I may pick up on this later on if I feel the need but currently with no money to invest in testing equipment, this is going nowhere.
So next, because I will have a computer in the car, I thought it would be nice to control the CD player from the computer. This allows me to have steering wheel controls that go to the computer and then they can be forwarded on to the CD player if I am using that. Also, the location of my CD player in my car is so low that it wouldn’t be safe to try and control it directly So controlling it via the computer would allow me to use the touch screen, which would be higher up.
There are many ways to control the headunit. I could continue to try and hack the protocol for the front panel or I could use the resistive controller that links to the steering wheel controls, or I could use the infrared remote.
I decided that hacking the protocol would be too much work and I wanted to use the resistive steering wheel controls for something else. So this left the infrared remote.
Now controlling the remote wouldn’t be so hard but it would look very messy having the remote somewhere in front of the unit or a little IR LED taped up somewhere. So I wanted to control the IR internally such that there is no point where the communication done optically. (Which is a waste of time – converting an electrical signal to light and then back to electricity again.) I also wanted the contact to be on the back of the CD player, to keep it neat and tidy.
Problem is, that the IR sensor is in the front panel, so it looked like I was going to have to hack the protocol anyway. But then I realised that the Aux socket on the front panel only needs Left and Ground to use the calibration mic. The right channel is no longer being used because I have access to it at the back of the unit already.
So now I could run the signal to the IR sensor’s output leg via this right channel wire.
After a lot of testing before hand (not shown ) I realised it would be possible to build something and get it working, so first of all it was time to get the IR signal into the main part of the CD player
It’s very small but just on the right side of the Aux jack. The PCB trace has been cut to stop signals from the jack socket going to the main unit. Also the jack has an inbuilt switch that grounds inputs when not in use. So leaving this trace intact would have grounded the line which I wanted to use. Not only would this have stopped everything from working, but the original infrared remote would have stopped working too, so it had to be cut.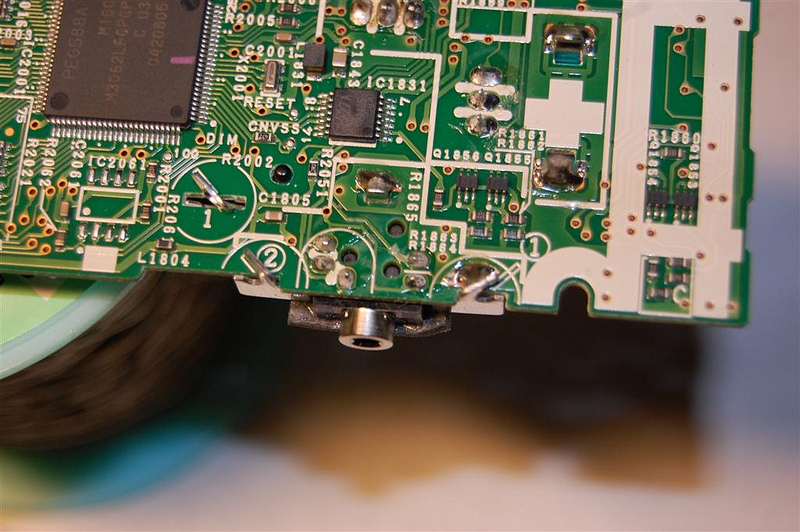
Next, I had to wire a jump wire from the output side of the IR sensor to the Right aux channel: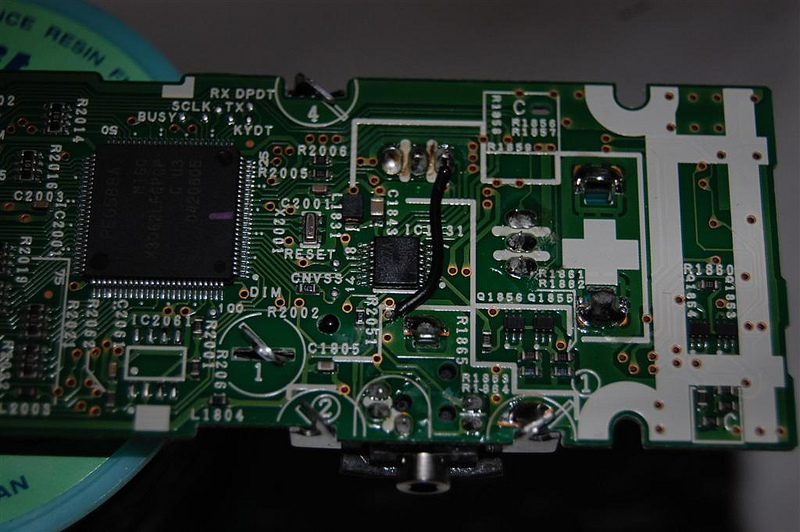
Next, was to do the same at the other end. I had to cut the trace for the Right aux on the main board. You can see it, just between the components and the socket: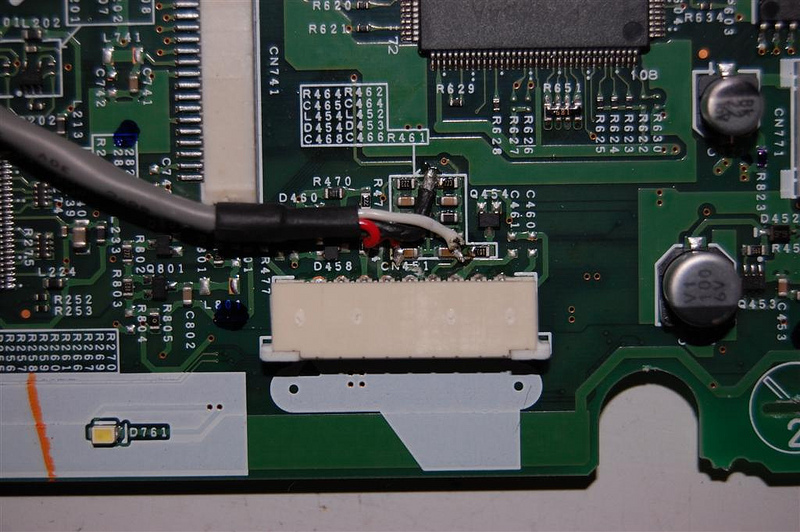
Because this is an expensive unit, and Pioneer have done such a nice job putting it all together, it’s only fair that I have the same level of professionalism about my mods. So I decided to build a custom board to hold the translator that will convert the RS232 signals to IR commands. It uses an ATtiny85 chip and some passive level converters to meet RS232 standards. The reason I wanted to use RS232 is because the computer is mainly going to be sending signals and not receiving them and serial is perfect for this. USB consumes resources, the computer has to constantly poll the USB ports to check what is there and there are a limited number of USB ports. Whereas I have plenty of RS232 ports which are not doing anything and can only be used for certain peripherals. This way I don’t waste USB ports or processing power.
So here is the board I designed: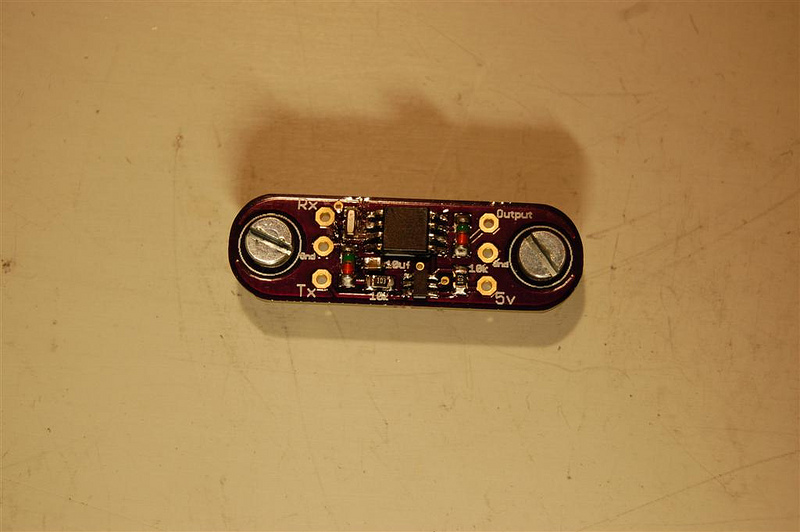
I had to hand-solder the SMD components, some of which were smaller than the tip of my soldering iron. Also, the ATtiny85 chip had to be programmed before soldering to the board which was a bit of an effort too. It meant that I had to write the program and test everything outside the CD player. So for a while I had a temporary wire sticking out of the front panel.
Here is the back panel where I mounted the RS232 socket. It is not fun cutting a square hole in steel, and I scratched the pack panel in doing so. I tried to polish it but it didn’t really come back to its former glory.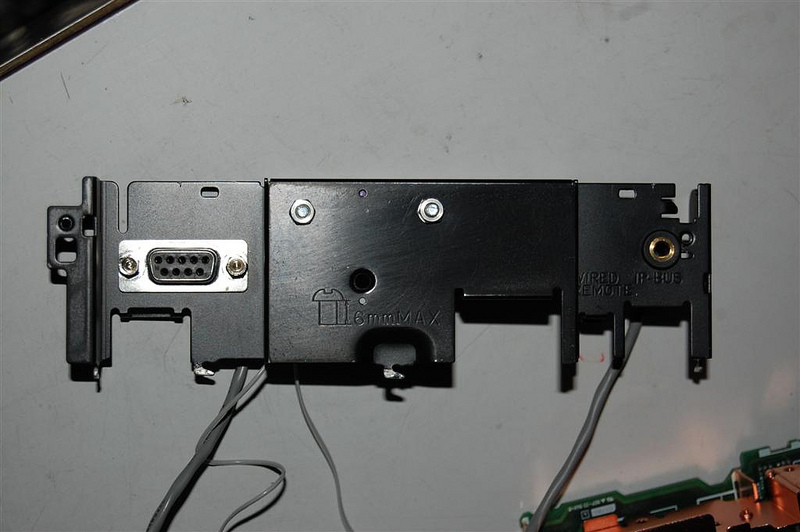
Here is the back of the board before mounting. Notice the plastic protector for the back of the board. This bit of plastic is something people would obviously never forget. They would never put the whole player back together without it, only to find that nothing works and it has to be taken apart again just to put a tiny bit of plastic back in………I mean who would be so daft?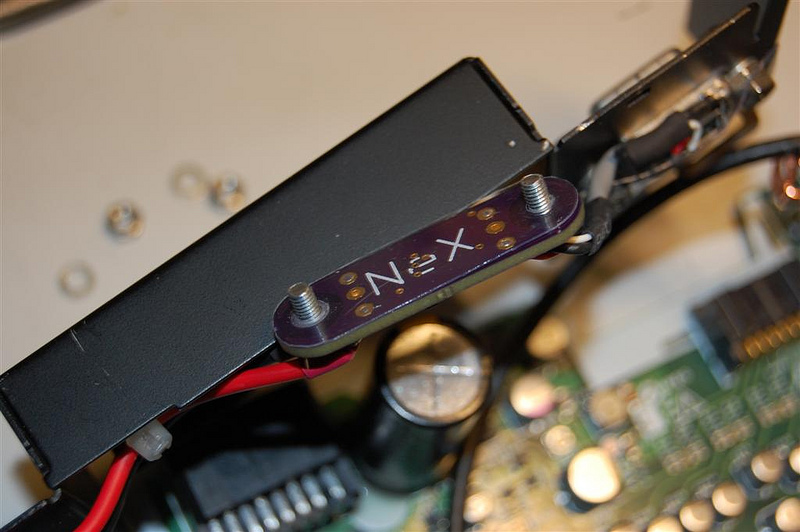
I used shielded wires for all the cables connected to the board and used heat shrink to keep them insulated.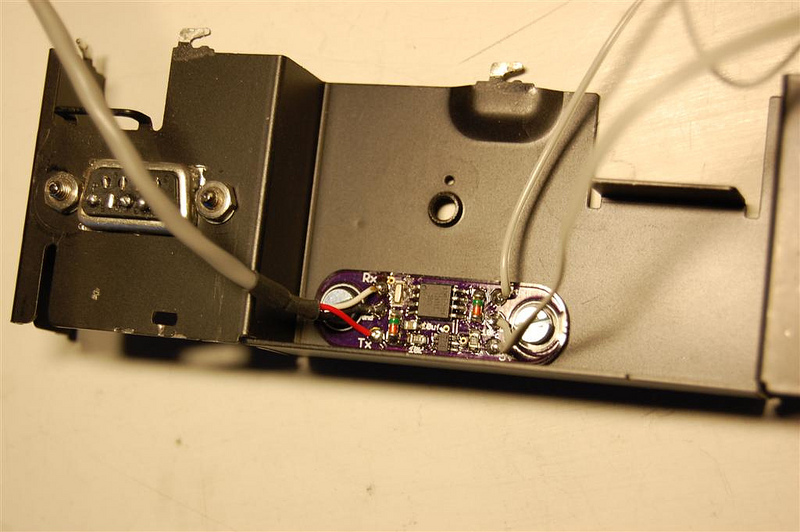
I also soldered on a bit of metal with some shrink wrap to make a wire clamp. I got the idea from the main board which uses similar insulated wires to hold the cables out of the way.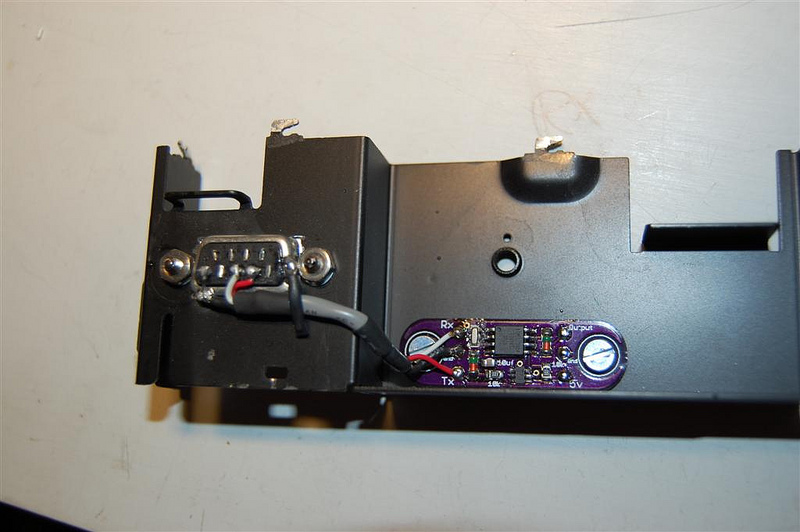
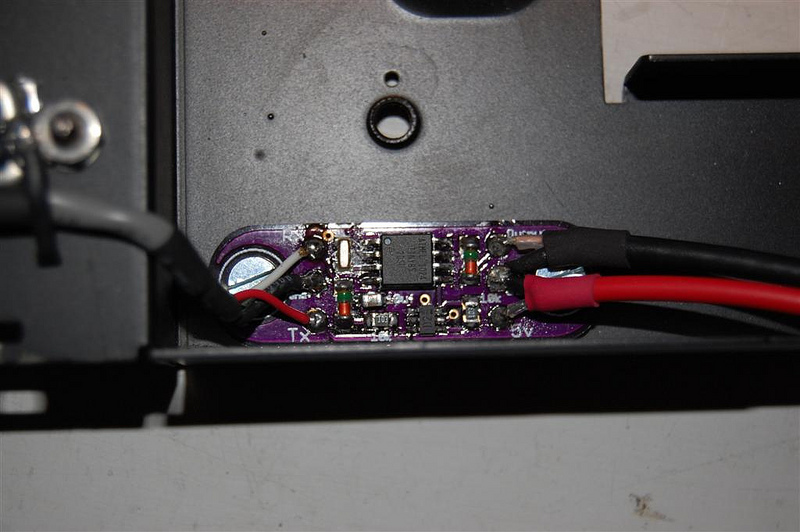
Here is the board with the wires in place.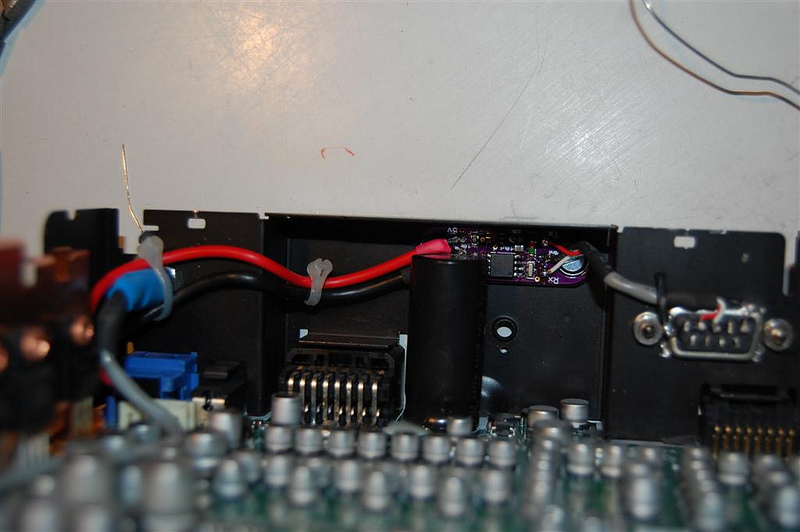
I also used a bit of plastic to protect the back of the RS232 socket, as it gets very close to the CD assembly.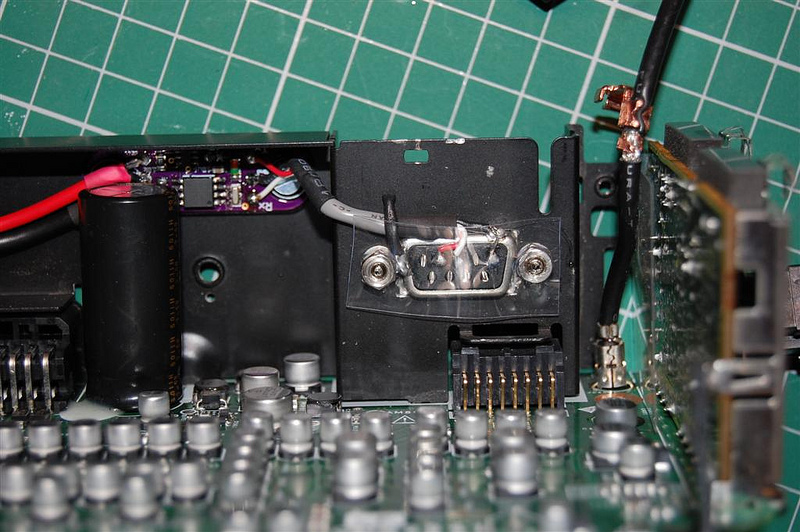
Here you can see the board, which only just clears the power cap!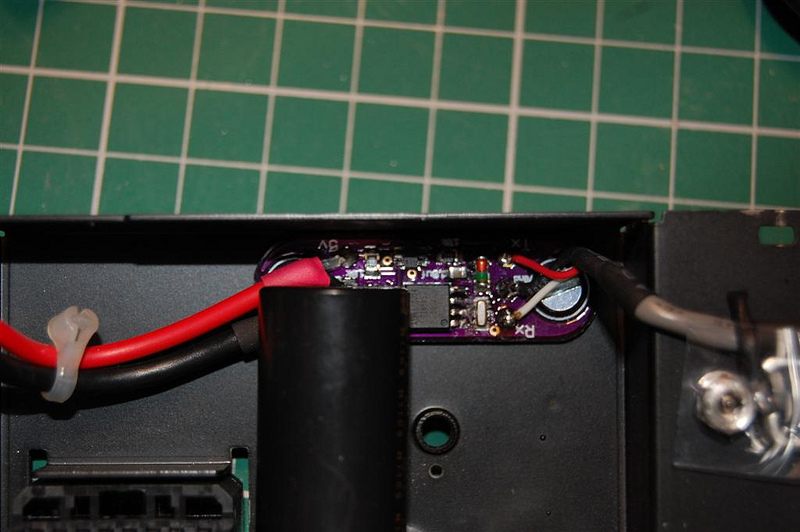
Here is the clearance between the RS232 port and the CD assembly.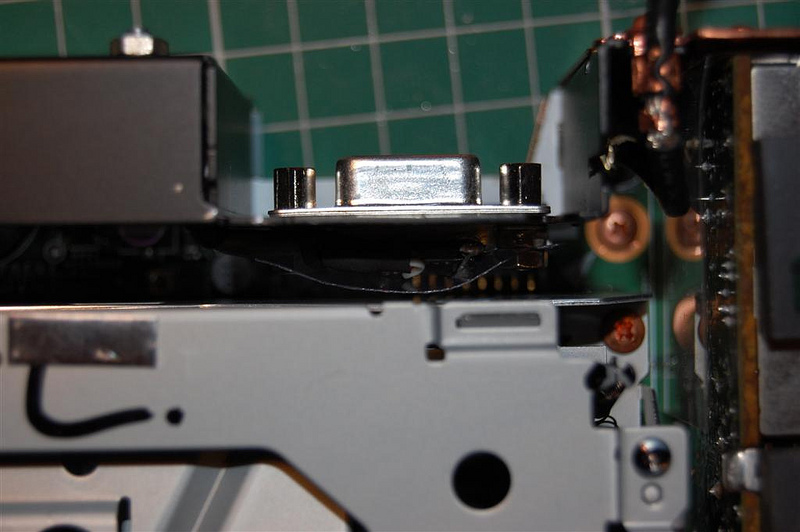
People don’t really read the small bits of text, they just look at the pictures&;.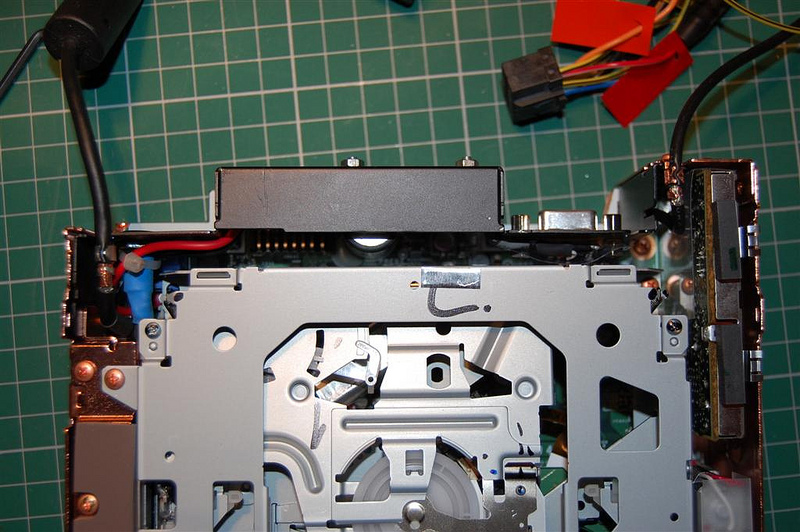
The red wire is for power and was wired to the P99’s USB socket. This provides power, as long as the front panel is connected. The last wire was the signal wire to the IR sensor. Again this wire is shielded and avoids the analogue side of the main board.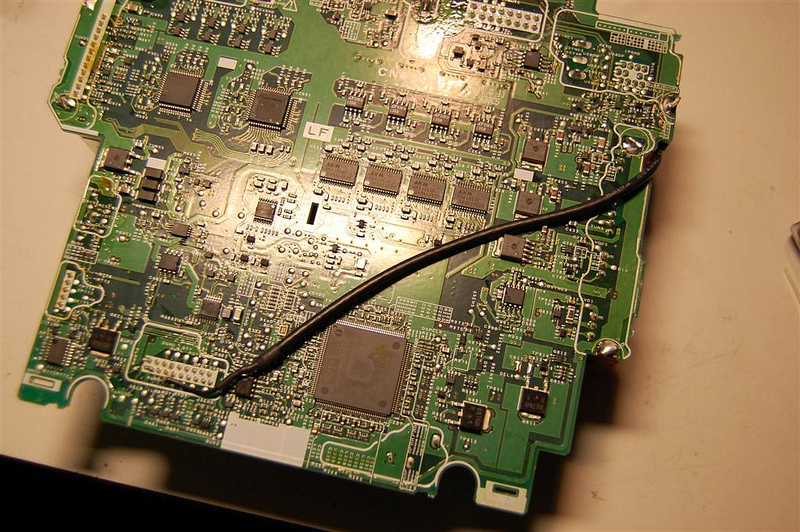
Here is a close up on the connection.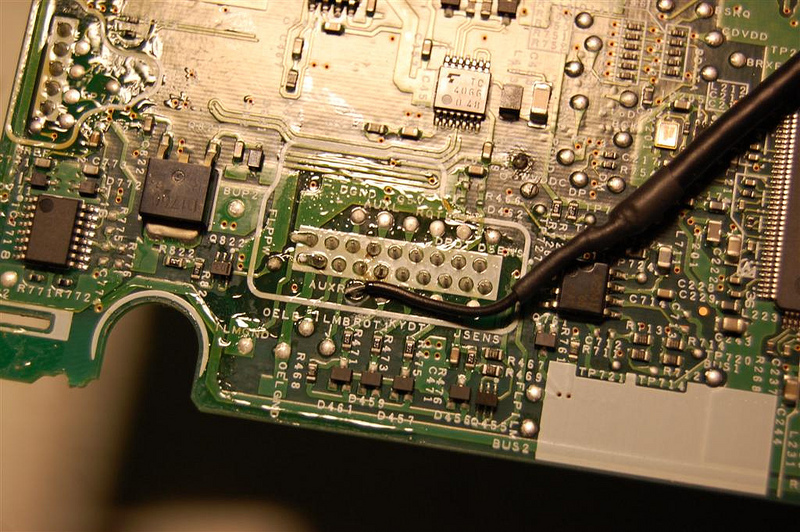
Here is a picture of the back of the player, with the new RS232 port.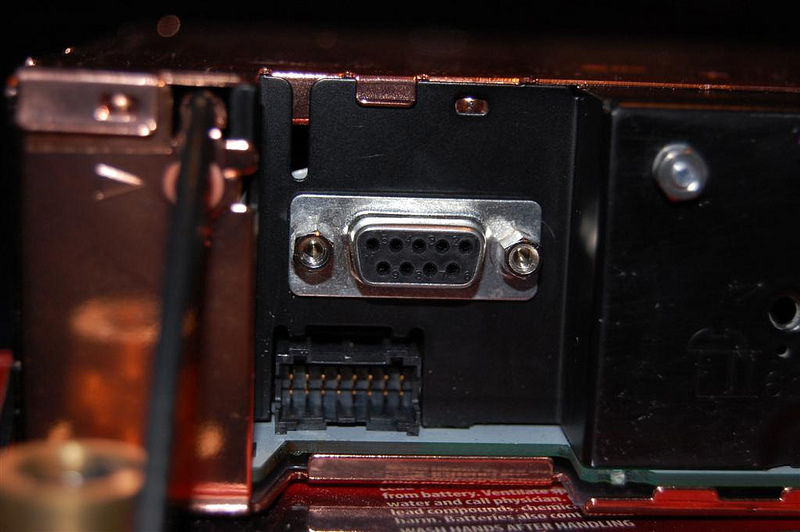
And with the serial converter connected just so I can test it with the laptop&;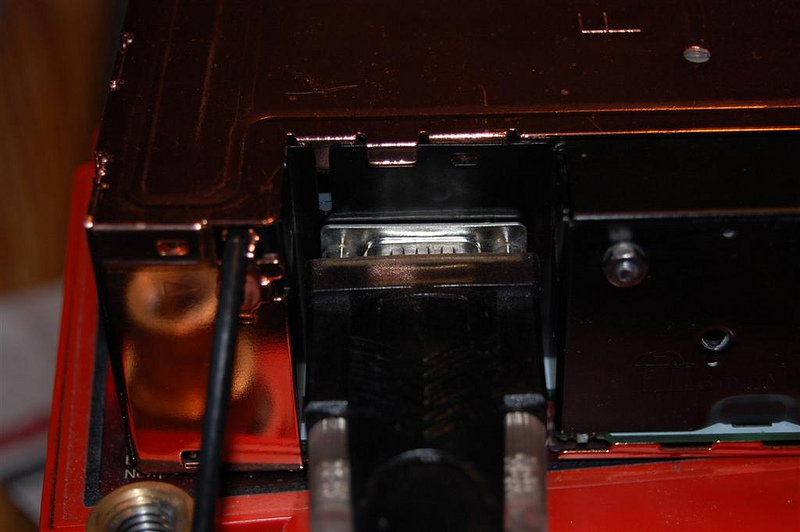
It all works! I can now control the CD player from the car computer by sending serial commands. This will be done by a custom application later on. But for testing I used hyper terminal. I had a bit of a problem doing the hold functions. In my initial design, the microprocessor I used worked fine because it had a hardware serial port, but the ATtiny85 doesn’t and the serial simulator is not as fast. So I had to invert the hold functions. Originally the hold was defined by the length of time a serial character was transmitted but now it is defined by the length of time a serial character is not transmitted. In other words, sending a character starts the processor in sending an IR command and unless it receives another serial command to interrupt it, it will continue to send until the hold function is complete.
This means pressing “i” will turn the CD player off but pressing “i” and then “x” will change modes. The final program running on the car computer will use a key down to send the command and then a key up to cancel it, so from the front end, the hold system will appear the same as the original remote control.
I also wrote in a few extra bits of code. Pressing “p” will cause the CD player to reply with “P99RS connected” this way I can check that it is actually working. Also pressing “D” will reply with the last five Infrared commands transmitted. but this is just for debug purposes.
Anyway, here is a quick video of it working, I still haven’t got the hang of simulating the key up and key down commands, so sometimes it didn’t respond.
http://youtu.be/tNcuFK4YhYw
WOW! Rayner here again! Can you IMAGINE what sort of things this bloke could come up with, if some manufacturer’s R&D department were to take him on, on an ad-hoc sort of basis. He has a brilliant bench, with knowledge and skills and above ALL a crazed love and passion for the tech. A passion for ‘Better’. Hell, if I were Honda Cars, I would snap him up for the high end cars’ OEM development team. They love a bit of ‘Better’ don’t they? But seriously, he has the ability to deliver what SHOULD be on that wish list, while most engineers need surveys to do that.
So Rayner says – EMPLOY THIS MAN!! You can PM him right here: Meanwhile, here is the thread – you may notice the lightest icing-sugar frosting on a Victoria Sponge – grade edit on his words reproduced above&;
link